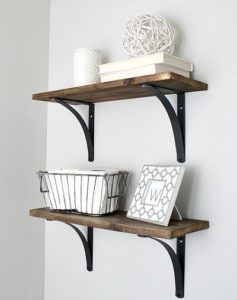
This is one practical and an attractive project to modify the mudroom, entryway or it can be planned to hang this anywhere in the house as it uses simple materials. Decorative hook rail can be made using crown molding, corbels and designer hooks.
Breaking up the wall color adds to a space, and finishing off the transition between colors with molding adds an elevated look to the room. Depending on the crown molding, hooks and the paint chosen, decor styles can be ranged from rustic to shabby chic to transitional or modern.
There can be many ways and ideas to make a decorative molding hook rail. Make sure to determine the location and placement of the hook rail.
1. Center the Backboard to Shelf
Center the backboard and shelf piece so as to ensure an even overhang on each and every side of the shelf. Tape measure can be used to mark off the ends of the backboard.
2. Wood Glue Base
Lengths of molding should be glued together so that they can be installed in one piece. Then, a thin beading of wood glue along the shelf piece should be applied from mark to mark. Make sure to wipe off the seeping glue right away as it will harden and become almost impossible to remove later.
3. Nail together the base of unit
Edge of the backboard piece should be laid on the floor with the shelf piece perpendicular and to be managed securely. Secure the two units together by nailing the ends of the unit using a nail gun. A nail should be secured every 2 to 3 inches to ensure the tight fit. Make sure to start on one end and make way towards the other, while nailing the bases.
4. Attach Corbel
A thin beading of wood glue should be applied on the interior side and the top edge of the corbel and also should be laid flat against the side of the backboard and bottom of the shelf at the right angle. Glue should be allowed to dry before nailing it in the place.
5. Nail the Corbel
Affix the corbel to the unit by nailing the seams outside of the corbel towards the backboard and the top of the shelf towards the top of the corbel, using the nail gun and nails. Corbel can now be affixed by nailing along the seam, using the nail gun and this can be repeated for the other side of the unit, for the second corbel.
6. Attach the molding
A thin beading of the wood glue should be applied to the molding and should be laid at an angle between the bottom of the shelf, the corbels and the backboard. Molding should be secured to the unit by using the nail gun and nails. Make sure to start from the inside corner and secure the top and bottom, then to move along the top and bottom seam towards the center of the unit.
7. Paint the Hook Rail
Initially, a coarse of sandpaper should be used to smooth the rough edges or any other imperfections in the wood, before applying the first coat of the paint. Make sure to apply the liberal coat of paint moving in the direction of the wood grain and allow it to dry before applying the second coat.
8. Measure and Mark
Measure and mark the hook placement. Make sure to mark both horizontally and vertically so as to have a uniform hook placement.
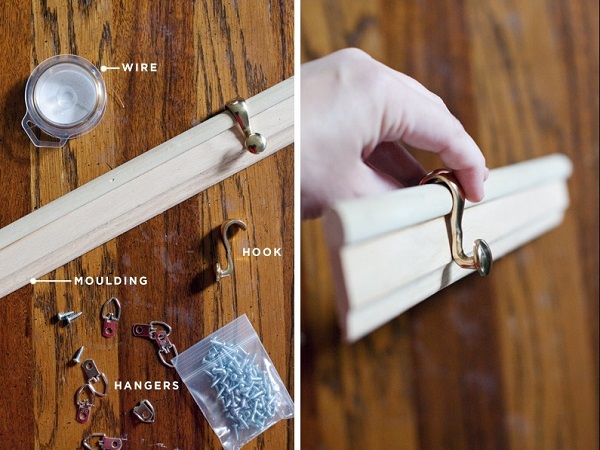
9. Attach the Hooks
Pre-drill the holes where it is marked for mounting. Make sure to mount the hooks onto the background of the hook rail using the makers and drill.
10. Mount the hook rail:
Hardware should be screwed into the wall and slide the screw into the keyhole on the back of each corbel as corbels are designed with keyhole mounting slots.